Deck footing spacing and layout
Updated 2026-10-23 7 min read
Most people do this backwards
The common question is "how far apart should deck footings be?" — as though there were a number. There is not. Footing spacing is post spacing, and post spacing is whatever the beam can span between them. Choose the beam first and the layout tells you where to dig; the guide to spacing for deck posts reads it off the table.
That is why the answer changes so much between decks. A deeper joist span loads the beam harder, which shortens what the beam can reach, which pulls the posts closer together. A beefier beam pushes them apart. It is one chain, and the footings are the last link, not the first.
The order that works
- 01Set the deck outline. Where the ledger goes, how deep the deck is, where the edges land relative to doors and grade.
- 02Size the joists for that depth. The clear span decides the joist — the span calculator does this in one step.
- 03Place the beam. Inboard of the outer edge if you want a cantilever, at the edge if you do not. This fixes the clear span for real.
- 04Size the beam and read off its span. That span is your maximum post spacing. Round down to something even that divides your deck width neatly.
- 05Mark the footing centres. One at each end, the rest evenly between at no more than the beam's span.
- 06Size each footing. Tributary area = half the joist span × half the post spacing either side. Now you know the diameter.
Steps two, four and six each have a tool: joist span, beam span, footing size.
Squaring the layout
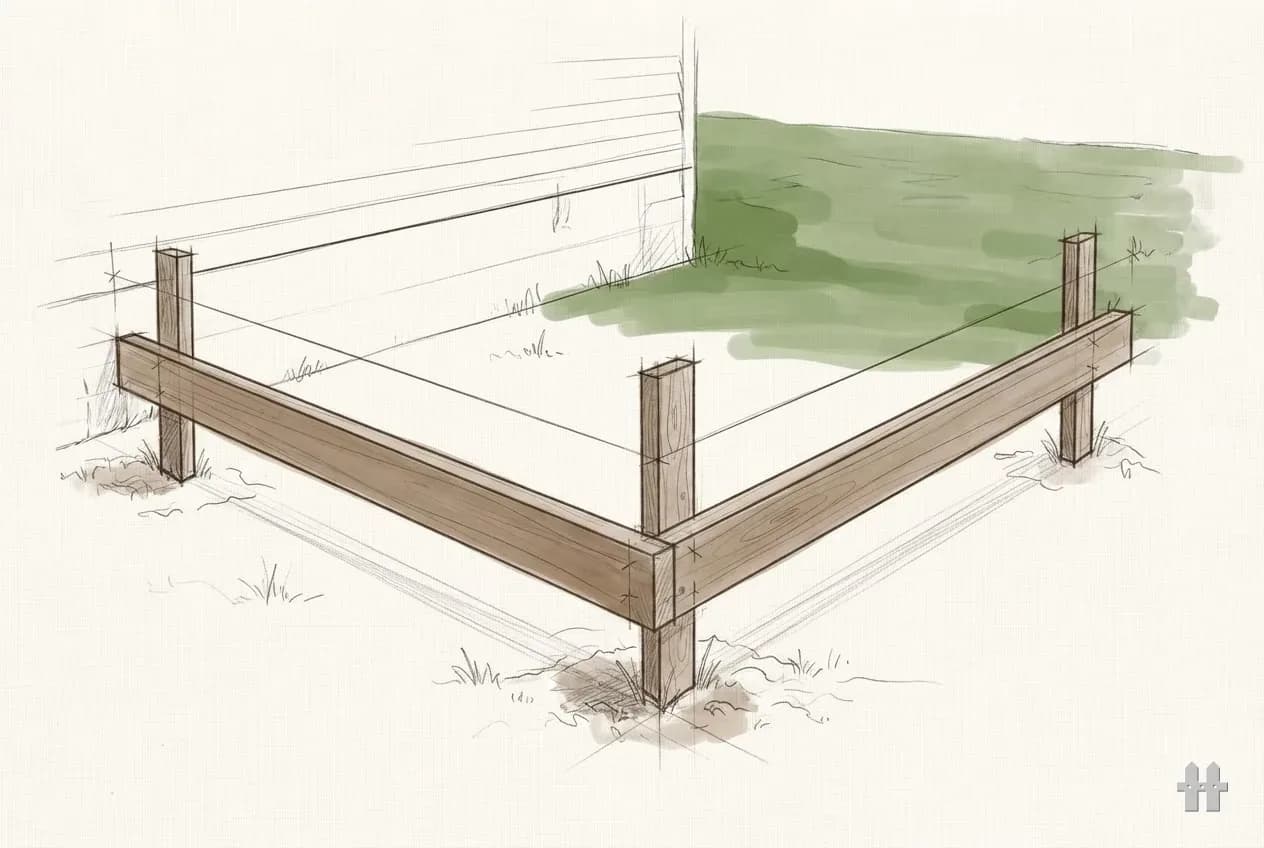
The ledger is your datum — it is fixed to the house and it is straight. Everything is measured square off it, never off a fence, a patio edge or the house's far corner, because none of those are reliably square to anything.
Run a 3-4-5 triangle off the ledger to get the first perpendicular, using the biggest multiple that fits: 6-8-10 or 9-12-15 is far more accurate than 3-4-5 on a 16-foot deck, because the same half-inch of error swings a much smaller angle over a long leg.
Then measure both diagonals of the rectangle you have strung. Equal diagonals mean square. If they differ, push one corner along its string until they match — do not split the difference by eye. This is the last cheap moment to fix it; after the concrete goes in, out-of-square costs you a rim joist.
Batter boards, and why string beats paint
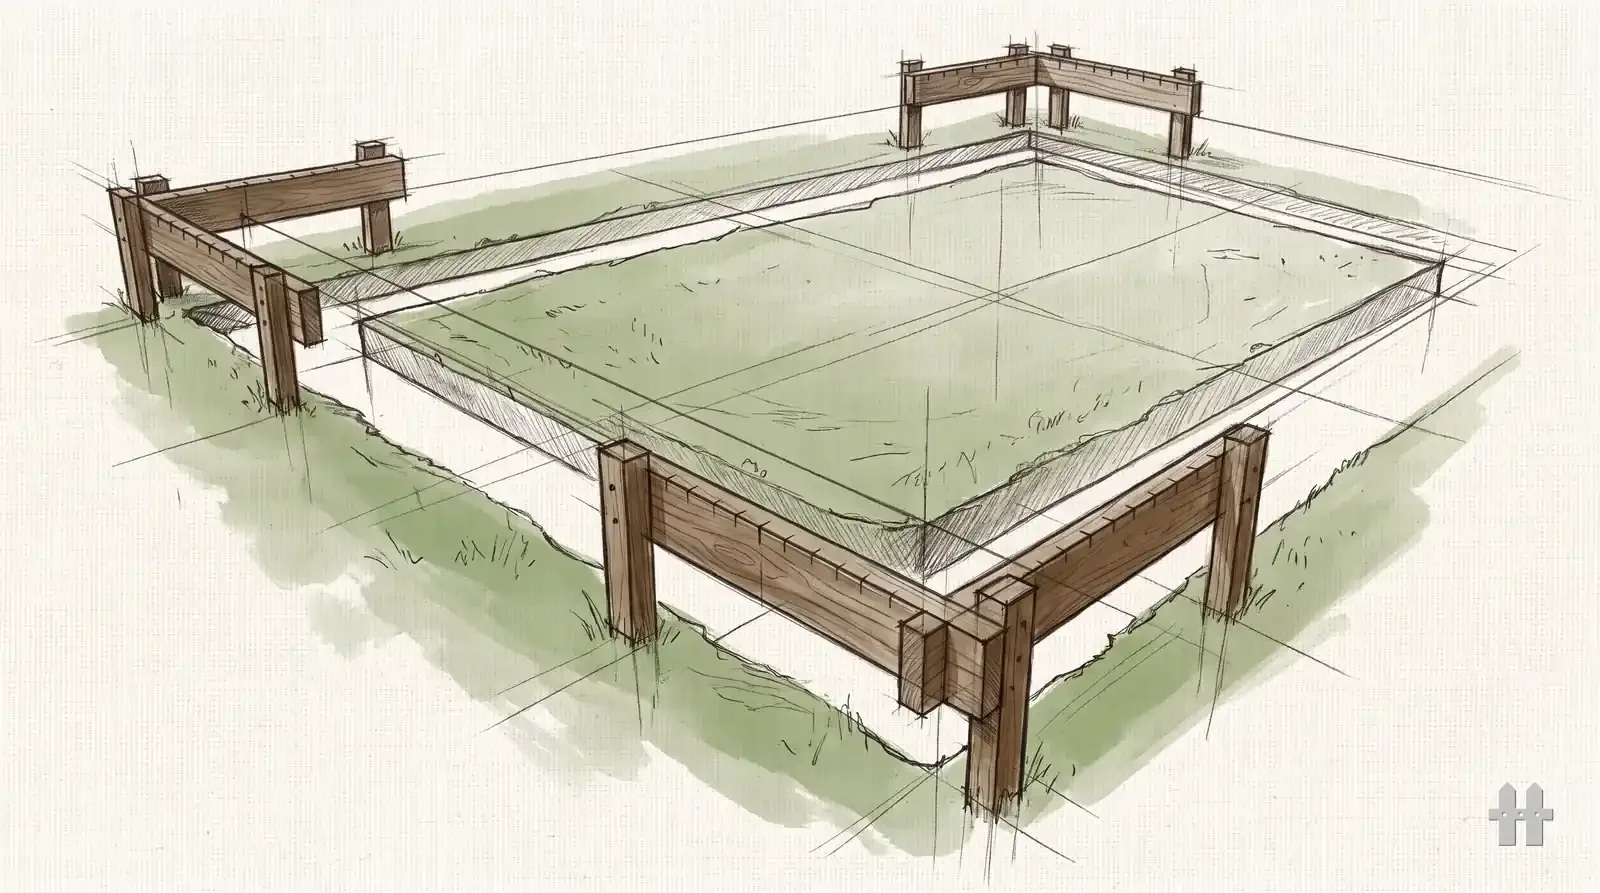
Batter boards are two stakes and a crosspiece set a few feet outside each corner. The string tied across them holds the line while the hole under it is being dug and the paint mark disappears with the first shovelful.
Mark the string position on the crosspiece with a saw kerf, not a pencil. When you drop the string to dig and re-tie it to pour, it goes back in exactly the same place. That one habit is the difference between a layout that survives a wet week and one that has to be re-strung twice.
Plumb down from the string intersection to mark the hole centre, and dig the hole generous around that point. The pier centre matters; the hole's edges do not.
The checks before you dig
Call for utility locates and wait the statutory period. This is not optional, it is free, and a deck post is exactly the depth at which services run.
Check the setback to the property line before the layout is final, not after. A deck that sits three inches into a setback is a deck that comes back out. The same map matters for a fence line.
Check downspouts, sump discharge and the drainage fall. A pier set in the path of roof water is a pier in saturated soil for the life of the deck.
Code requirement
Post spacing follows the beam table your jurisdiction has adopted. Your jurisdiction may amend the model code or adopt a different edition. Confirm with your building department before you cut.
Sources
- 2021 IRC § R507.5 and Tables R507.5(1)–(4), Deck Beams (UpCodes) read 2026-10-18
- 2021 IRC § R507.4 and Table R507.4, Deck Post Height (UpCodes) read 2026-10-18
Filed under Deck framing & structure — 19 tools, guides and comparisons in this pillar.
Next on the pile
Deck beam span calculator
Post spacing falls out of the beam you can buy.
Deck footing size calculator
Diameter from the tributary area this layout creates.
Deck footing depth
How deep the holes go once they are marked.
Deck permit requirements
The open-hole inspection this layout has to survive.
How to build deck footings
What happens after the holes are marked.